Professional Electronic In/Out Board
|
Index | Chapter 1 | Chapter 2 | Chapter 3 | Chapter 4 | Chapter 5 | Chapter 6 Chapter 6 - Administrators Guide (Tools > Setup) This Administrators Guide is designed for those responsible for setting up and maintaining the Staffinder infrastructure. This infrastructure includes all data and settings necessary to enable the complete and proper operation of the program. Once Staffinder is configured with your company's departments, employees, in/out choices and other settings, it can be maintained by IT or selected Staffinder administrators. While many computerized In/Out systems utilize a separate administrative console, Staffinder designers have incorporated the administrative components (Setup) into the client application. This design was intended to: a) eliminate the need to install an administrative client, and b) allows Staffinder to be administrated from any client PC or laptop. Running Staffinder for the first time:
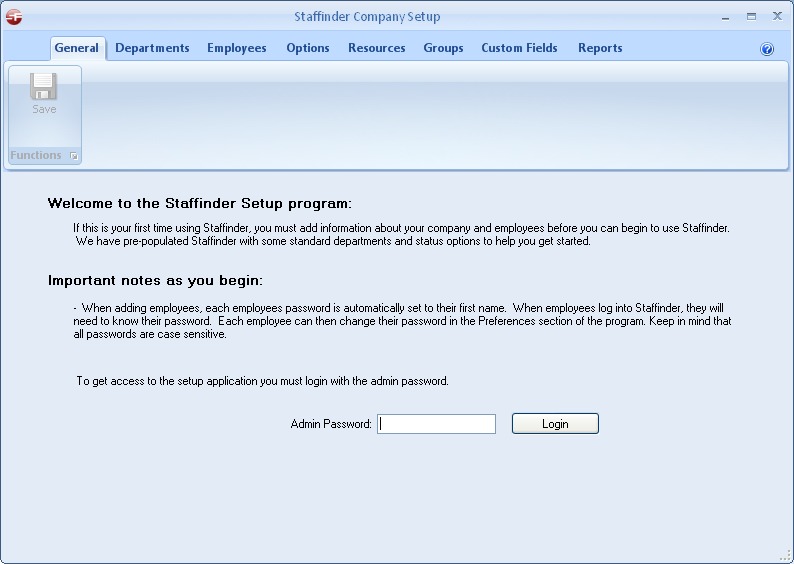
After Staffinder is installed on any computer in your environment, it can be used to configure and administer the program. To open Setup follow these steps:
Before you can perform any task on these screens, the Administrator Password must be entered. The Administrator Password shipped by default with the program is "Admin" (case sensitive). We strongly recommend changing this password after you login with the default password. This is done on the General Tab after logging in.
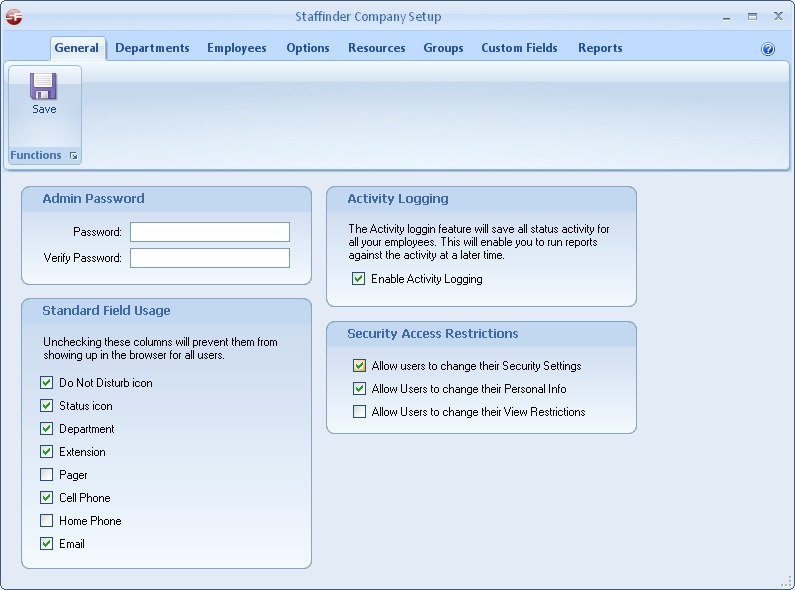
This section contains various global settings that control what your users can see and do.
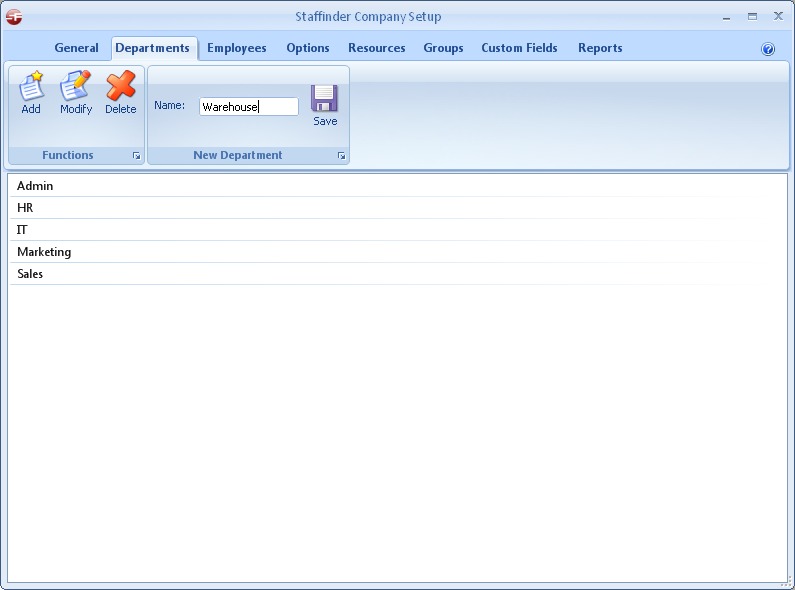
This is where you setup your departments. You should enter all the departments in your organization before you proceed to add your employees. Employees must be a member of a department so you will need to have them when adding employees. Adding a Department: Click the Add button in the functions panel to display the New Department panel. Enter the Name of the new Department and click the Save button. Modifying a Department: Click the desired department in the list to display the Modify Department panel. Enter the Name of the new Department and click the Save button. Deleting a Department: Click the desired department in the list and click the Delete button in the Functions panel. You will be prompted to confirm the action.
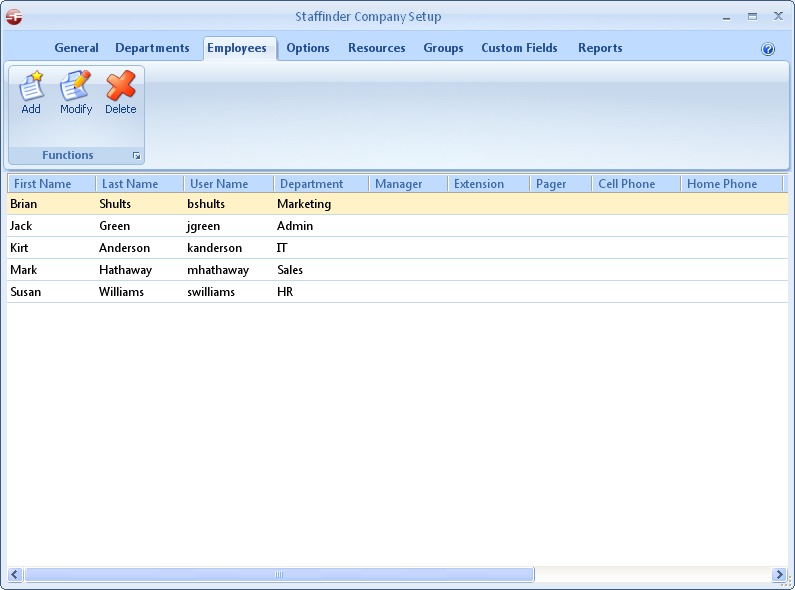
The best strategy to use when adding employees is to add the managers first. While it is not required to assign users a manager, built-in Security functions will not work properly if users are not assigned a manager.
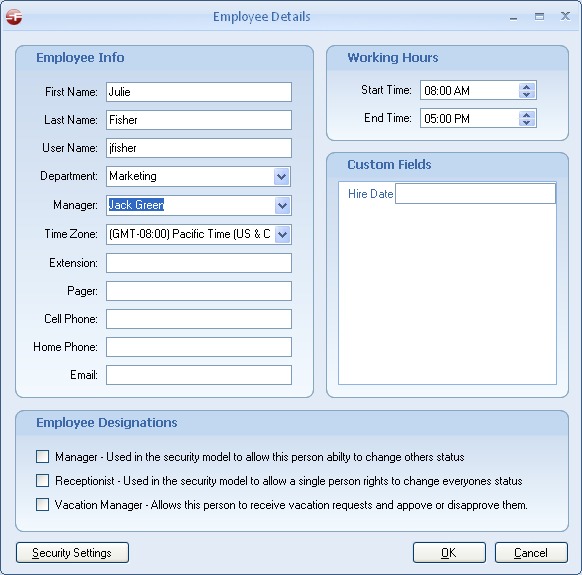
Adding an Employee: Click the Add button in the functions panel to display the Employee Details dialog. Important Note: Passwords are automatically assigned to each new employee added to Staffinder. Staffinder uses the employee First Name as the default password. These passwords are case-sensitive. Please encourage your employees to change their password when they start using Staffinder to avoid security problems. Example: If you create a user name "Elmer Harris", his Staffinder password is "Elmer". Tip: The checkboxes for "This person is a Manager/Receptionist" are directly related to the security features in Staffinder. Modifying an Employee: Hightlight the individual in the Employee List (Figure 6.3) and click the modify button. The employee details dialog (Figure 6.4) will be displayed with the current information for the individual. Once you have finished editing the data click the OK button to save the changes. Deleting an Employee: Highlight the individual in the Employee List (Figure 6.3) and click the Delete button. You will be prompted to confirm your action.
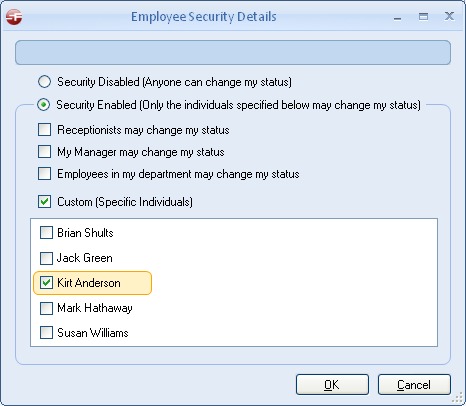
Employee Security:
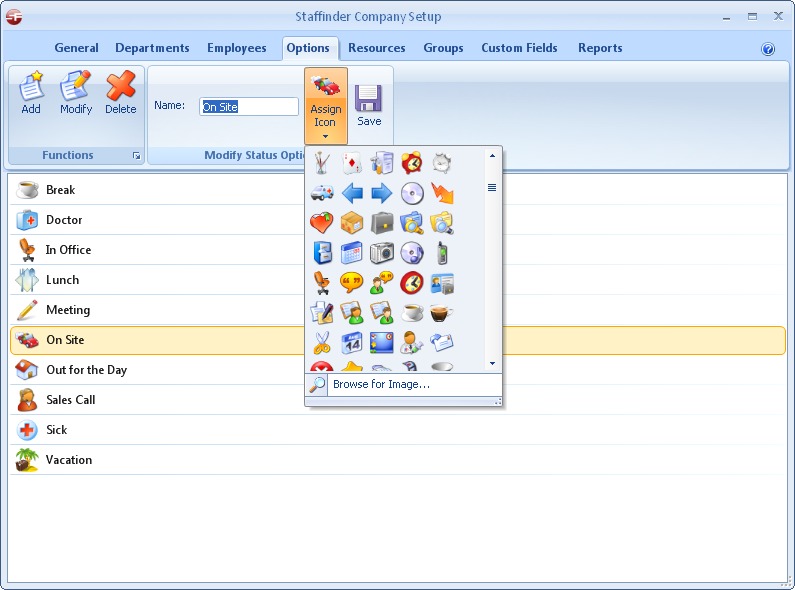
Staffinder ships with 8 standard In/Out choices to help get you started. You can add additional selections as needed to fit your business needs and configure them with custom icons if desired. See Figure 6.4. Adding an Option: Click the Add button in the functions panel to display the New Status Option panel. Enter the Name of the new Option and click the Save button. Modifying an Option: Click the desired Option in the list to display the Modify Option panel. Enter the Name of the new Option and click the Save button. Deleting a Department: Click the desired Option in the list and click the Delete button in the Functions panel. You will be prompted to confirm the action. Staffinder ships with a number of high quality icons to choose from. If you have an icon that you wish to use you must copy the icon into the "icons" directory on you local drive.
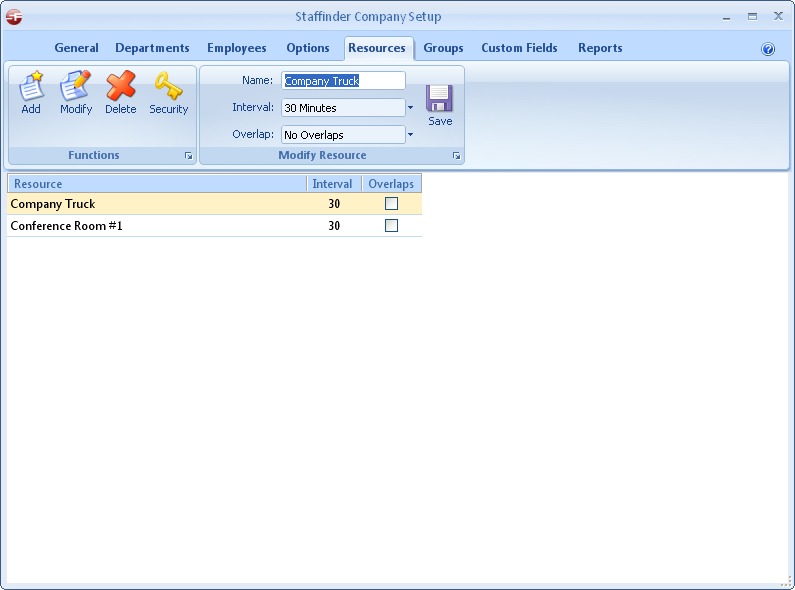
The Resources tab (Figure 6.5) is for configuring resources. Resources can be anything you wish to schedule time against. Conference rooms are the most common resources but you can use almost anything you like. Video Equipment such as an Infocus machine or a laptop is a good example of something you may wish to keep track of. Depending on what the resource may be will also determine the time increments you will want to use. We include Company Events as a pre configured resource. You can use this resource for any company wide events that employees will want to know about. Company parties for employee birthdays or retirements are good examples of event to track. Adding a Resource: Click the Add button in the functions panel to display the Resource edit window. Below is a description of each of the fields.
Deleting a Resource: Select the Resource in the list and click the delete button. You will be prompted to confirm your action. Modifying a Resource: Select the Resource in the list and click the Modify button.
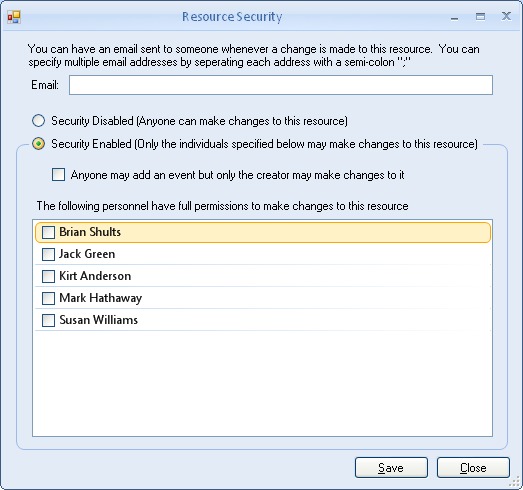
Security Permissions: You have the ability to specify who can and cannot add schedules to a Resource via security settings. Security has 2 options when enabled. You can allow anyone to add a schedule but prevent someone from deleting schedules that others have added. This will prevent malicious actions of people deleting schedules that others have entered. You also can specify specific people who have full permissions for a resource by checking the box next to their name in the list. Notifications: You can also be notified when a resource schedule is added or changed. Specify the email address in the notification box to enable this feature.
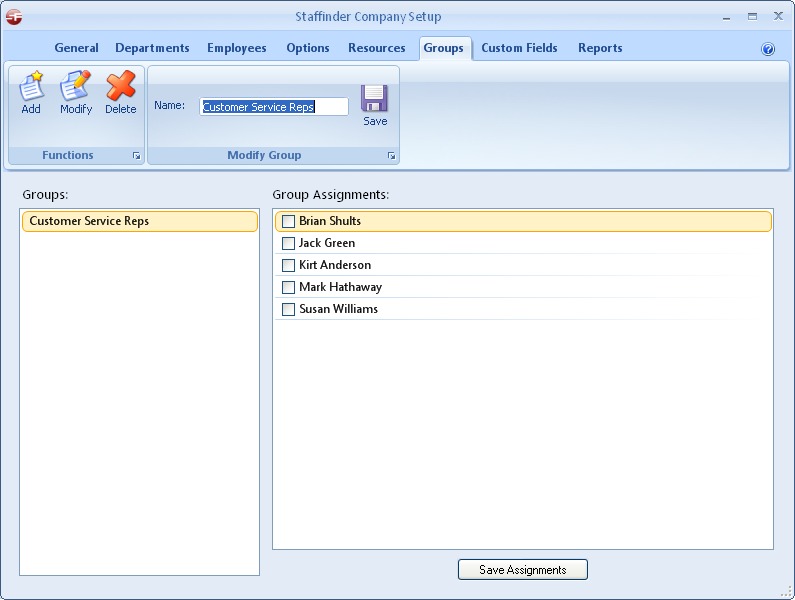
The Groups tab (Figure 6.7) includes setting for custom groups that you may want to create. Groups are used throughout Staffinder for filtering and soring. They are also handy in the browser when viewing employees. An employee can be a member of multiple groups so there is no limit to how you can configure them. Adding a Group: To add a group click the Add button in the Functions panel. Enter the name of the group and click Save. Modifying a Group: Highlight the group in the list by clicking it and click the Modify button. Enter the new name for the group and click the Save button. Deleting a Group: Highlight the group in the list by clicking on it and then click the Delete button. You will be prompted to confirm your action. Assigning Members: To add or remove members from a group you first select the Group in the list of available groups and check the box next to the persons name in the list of group assignments and click the Save Assignments button.
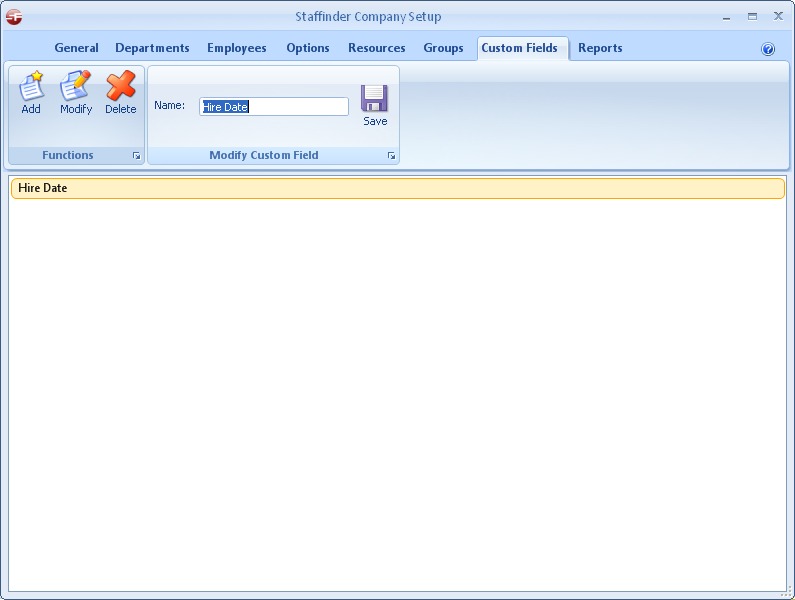
Staffinder allows you to create custom fields for displaying in the Browser. These feilds are populated in the Employee Details dialog for each employee. Adding a Custom Field: To add a Custom Field click the Add button in the Functions panel. Enter the name of the Custom Field and click Save. Modifying a Custom Field: Highlight the Custom Field in the list by clicking it and click the Modify button. Enter the new name for the Custom Field and click the Save button. Deleting a Custom Field: Highlight the Custom Field in the list by clicking on it and then click the Delete button. You will be prompted to confirm your action.
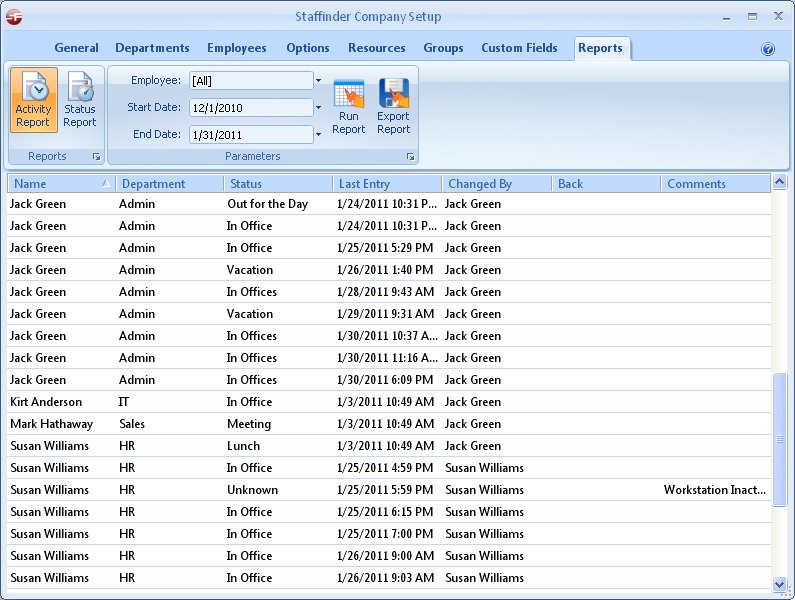
Staffinder has 2 administration reports. Both reports have the ability to print to the screen for viewing only or export into a report format. Once exported you can save it in popular file formats like pdf or xls. Use the optional parameters to help filter the results Activity Report: This report lists all status activity for your employees. In order for this report to work you must enable the Activity Logging feature described in the General section of this chapter. Figure 6.9 shows the Activity Report when using the Run Report option.
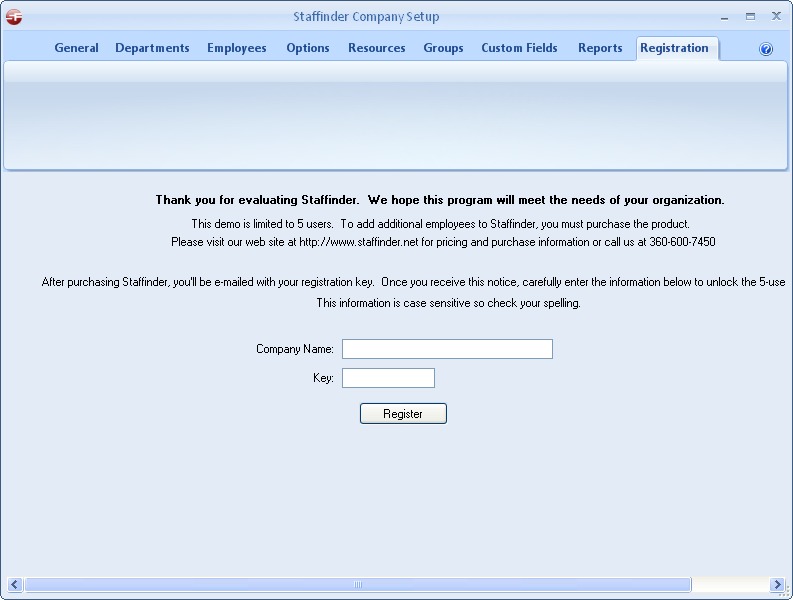
Once we notice of your payment, we will be informed of your purchase and given your e-mail address. We will then send you an e-mail with your company name and registration key you'll use "unlock" your 5-user demo. If you ordered via PayPal using a credit card, expect notification within 24-hours. Those paying with company checks will receive notice after your check has been received and processed. Important: We get many emails indicating that they have not received their registration information after several days. Be aware that Spam Filters will block our emails. If you don't receive our email within 24 hours please check your spam log for our email before you contact us. Our email is flagged as Important and also will request a Read Receipt. Please honor this when you get the registration email so we know that you received it correctly. You would then enter your company name and code into the space provided on the "Register" tab in the Setup (figure 6.10). After you enter the correct company name and code, Staffinder will again thank you for the purchase and confirm the program is now unlocked. After the program is successfully unlocked, the Register tab will no longer appear and you can enter add your remaining employees.
Index | Chapter 1 | Chapter 2 | Chapter 3 | Chapter 4 | Chapter 5 | Chapter 6 |