Professional Electronic In/Out Board
|
Index | Chapter 1 | Chapter 2 | Chapter 3 | Chapter 4 | Chapter 5 | Chapter 6 Chapter 4 - Advanced (and Cool) Staffinder Features
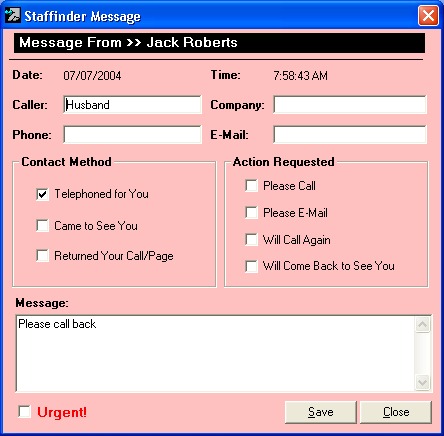
A new and very cool feature in Staffinder is the ability to send messages to other employees. After you determine another employee is away from the office, the next step might be to send some information about a visitor or caller. Not to be confused with an e-mail system, Staffinder allows users to send "While You Were Out" messages to other employees, replacing the standard form typically available in pad form. Message recipients can view, save and delete messages as needed. To send a WYWO message to another employee, either:
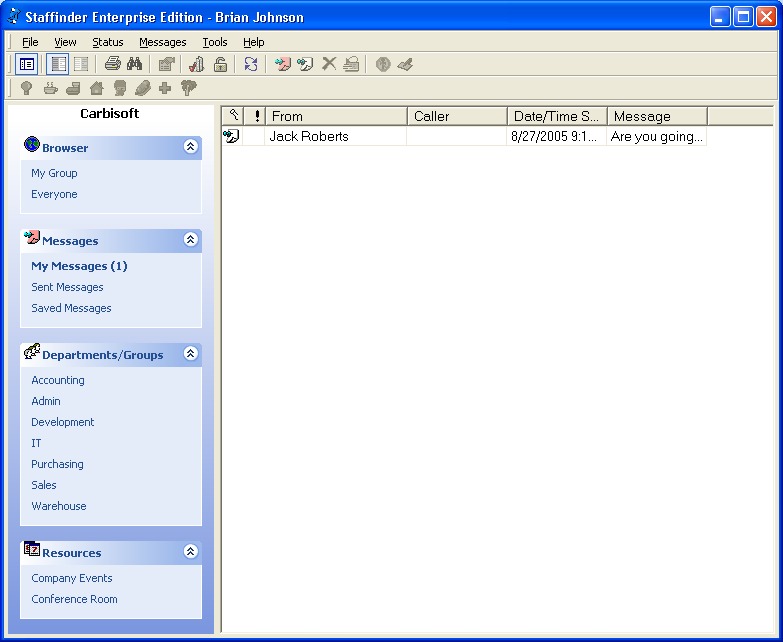
Receiving Messages: Sent Messages: You can also view the messages that you have sent to others. You can delete them or edit them as well.
Deleting Messages: Here are the 2 methods of deleting a message:
Note: When reading messages, it may appear that you can edit them. However this is not the case. Any data you change in a message sent to you will not be saved.
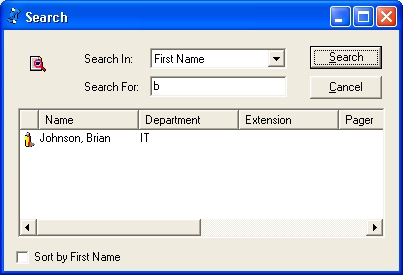
While it may be convenient to use Staffinder to locate the extension or pager number of an employee, what happens when you have a pager number or extension and need to match that up with an employee. In large environments with a hundred or so employees, matching employees with their phone numbers can be time consuming. To help you save time performing this type of search, we added a Search function into Staffinder. This feature allows you to pull up matching employee records by searching for a extension, pager, cell number, home number or by a first or last name. Below (Figure 4.3) is a screen shot of the search screen. In this example, the user searched the Extension field for entries that include "12". The result is not limited to people who have an extension of "12", rather it includes all employees who have "12" anywhere in their extension. You can make your search as loose or tight as needed. To reduce the search shown more, the user could add a third digit to the search. If the user searched for "120", the record for Beth Craig would appear by itself.
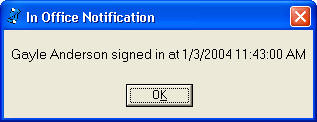
You need to talk to your manager or another employee ASAP on an important decision. You check their office every 5 minutes only to find yourself wasting time. That's where the "Notify me when In Office" features comes in handy. This feature lets you select an employee to monitor who is currently not "In Office" and have Staffinder notify you when they sign back "In Office". Using "Notify me when In Office":
Note: You cannot set a "Notify me when In Office" alert for any employee who's status is "In Office". If the individual has their idle feature turned on their status will be "Unknown" and thus this feature will be available.
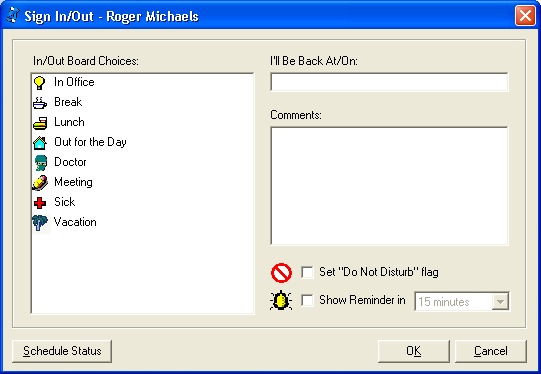
If you have purchased the Add-on package to include the Status Scheduler you will now have the ability to schedule future status changes. You may schedule as many as you like and your status will be updated accordingly. With this feature you will be able to create your daily schedule in the event you will be out of the office. A new button will appear on the Sign In/Out screen (Figure 4.6)once the Add-on is installed.
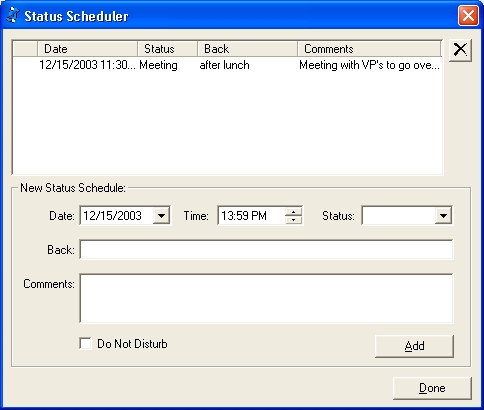
When you click the Schedule Status button you will be shown the Status Scheduler dialog (Figure 4.7). This is where you create the individual status schedules. Simply enter the date and time you wish your status to be change and any additional comments or Back At details. Click add and your done. The server component will monitor your entries and change your status at the appropriate time. To remove a schedule simply highlight it in the list and click the "X" button. Once a schedule has been activated it will automatically be removed from the system.
Index | Chapter 1 | Chapter 2 | Chapter 3 | Chapter 4 | Chapter 5 | Chapter 6 |